Adding Rules to Rulesets
Procedure
To add rules to rulesets:
Select Admin.
The Admin Home Page appears.From the Policy Administration tab, select Rulesets.
The Rulesets screen appears.Select view/edit in the row for the ruleset to which you want to add rules.
The Ruleset Definition screen appears.In the Rules section, click Add.
The Rule Definition screen appears.Enter a name for the rule, and select an attribute from the Attribute list. The rule evaluates the attribute using the rules conditions you define. The Rule Name must be unique.
Click Save.
The Conditions section appears.To specify that this rule is the root rule, select the Root check box. The root rule is the first rule evaluated, and therefore the attribute for this rule should be your first priority for assignment. There can only be one root rule.
In the Conditions section, click Add.
The Rule Condition screen appears.In the Define Condition for Attribute Name section, select the option button for the type of condition you want to define using the following guidelines
To create a default for the rule, select the Default option button. The default has a result, but no conditions, so it is always true. It is the last condition evaluated.

For a simple comparison, such as attribute is equal to or greater than some value, select the following option button:

To compare the attribute to a range, select the following option button. For example, use this type of condition to establish a range for invoice amounts. The values you enter establish the range that the attribute must fall within to meet the condition. Use this type of condition for attributes that are numeric, or can be sorted in alphabetical order.

To create a condition in which the attribute is equal to a series of discrete values, select the following option button. For example, use this type of condition to assign specific customers to a segment or workgroup. You enter the attribute values separated by commas.

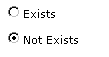
To create a condition based on whether or not a value exists, select the Exists or Not Exists option button.
For conditions that are simple comparisons or comparisons to a range of values, select the appropriate comparison operator from the list for the condition type you selected.
Note: The comparison operators that are available depend on the comparison type, and whether the attribute you selected for comparison is numeric value or a string. For a comparison to a range, the available operators are less than. or less than and equal to. For a simple comparison, for a string attribute, the values are equal to or not equal to. For a numeric attribute, the values are equal to, not equal to, greater than, greater than or equal to, less than, less than or equal to.
In the entry field for the condition type that you selected, enter a value for the comparison. You can enter either a string or a number.
Notes:
You must enter a string as it is entered in the database.
When entering a numeric range, enter the lowest value for the range in the first field, and the highest value in the second field.
When entering an alphabetical range, enter single letters to establish the range.
For some attributes, a list appears. You select the available values from the list.
In the If Condition is Satisfied section, do one of the following:
If you want the invoices that satisfy the condition to be evaluated by another rule, select the Evaluate Rule option button and select the rule. Select this option when there are multiple conditions that an invoice must satisfy before being assigned.
If invoices satisfying this condition can now be assigned, select the Assign Segment or Workgroup option button and select either a segment or a workgroup from the list. Select this option when satisfying the condition is the final evaluation required for assignment.
Note: Any invoices that do not meet the condition are evaluated by the next condition defined for this rule.
To return to the Rule Definition screen, click Cancel.